Build a simple chat app with node.js and socket.io
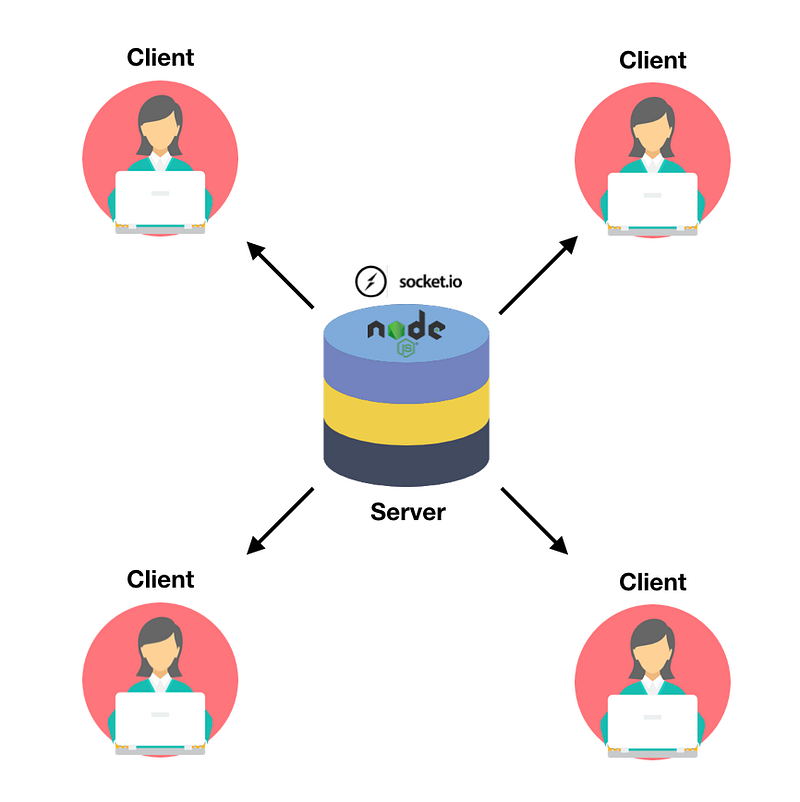
To develop a real chat application, we have to put in place a real-time system of sending/receiving data. It will be impossible to do it with a relational database and Ajax calls. Thank’s to WebSocket and the library socket.io, it becomes easy.
You can follow this tutorial with my repo Github: https://github.com/ngrt/simpleChatApp
Technical stack
Here is the technical stack that you are using for this app :
WebSockets and socket.io
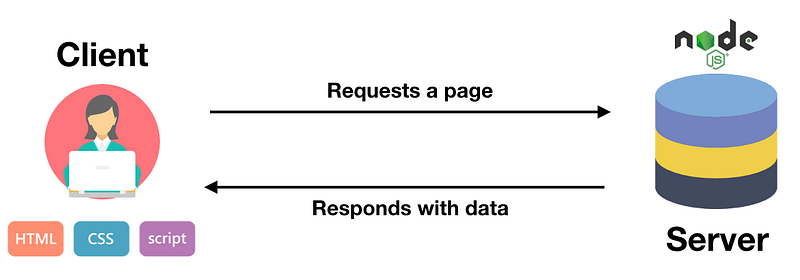
WebSockets is a protocol that allows a bilateral synchronous exchange between a client and a server.
In the classic web, a client requests to a server and a server responds sending it back the data. This system is impossible for a chat app.
In WebSockets, the server can send data to the client, but the client can too ! A WebSocket is a kind of communication pipe opened in two directions.
Socket.io is a library based on this protocol to make the use of WebSockets easier.
The Javascript mafia
Node.js is a Javascript back-end technology executed by the server as PHP, Ruby or Python. JavaScript uses events. Node.js keeps this particularity so it is easy to make asynchronous code.
Node.js comes with its own package manager: npm. It becomes easy to install, update, delete packages.
In this tutorial, we are going to use express.js. It’s a micro web framework based on node.js.
Set up of the development environnement
First of all, we need to configure our development environment.
The first thing to do is to start npm, our packages manager. To do so, open a new terminal, create a new repository which will contain our project, go in it and initialize npm:
$ mkdir createSimpleApp
$ cd createSimpleApp
$ npm init
npm will ask you for several information. If you want to skip that, press enter until the end. Now if you look at your project, we will find a new file : package.json. This file is listing all your dependencies.
So now, we are ready to install the packages needed to develop our chat app! We are going to need these packages:
- express: the micro web application framework for node.js
- Nodemon: a package that will detect any changes and restart our server. We will use it instead of the classic node command.
- ejs: a template engine to simplify the production of HTML
- socket.io: the famous package than manage WebSockets
To install them on our environment, it is super easy:
$ npm install --save package_name
I let you do the work for our 4 packages.
In your package.json, you could add this line into your scripts key:
“start”: “nodemon app”
With this line, you will be able to launch your app only with one commande using nodemon:
$ npm run start
Our environment is set up, we are ready to develop our application.
The chat app
Architecture of the app
First of all, we have to separate to part in the development of an application: the client part and the server part. We will have to develop the two parts to make our application up and running.
The server will be handled by node.js to make all the engineering (launch the packages and the website). This code will not be seen by the client.
The client part will be loaded on the computer of the client. He will have direct access to the files (html/css and js).
Server side:
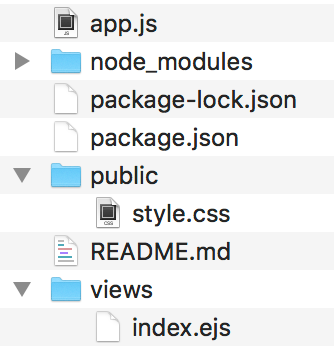
We have to create the file app.js that will launch our server and all the packages.
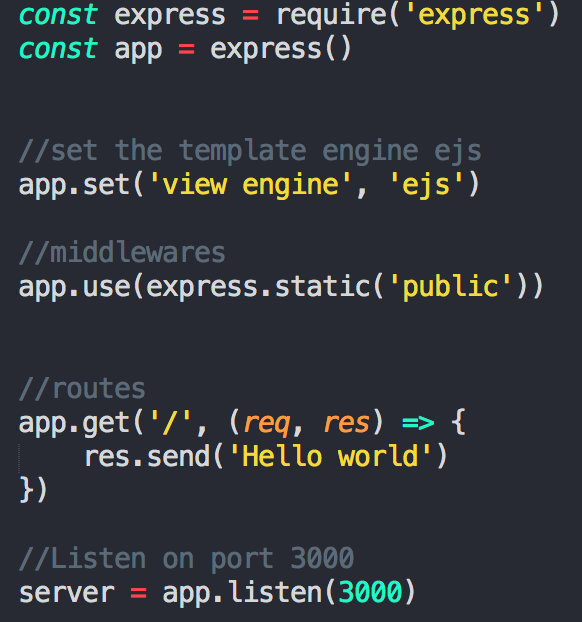
This bunch of code is actually initializing our express app. If you go to http://localhost:3000, you will see a gentle message.
Now we just need to configure socket.io to be ready to deep dive into the WebSocket world.
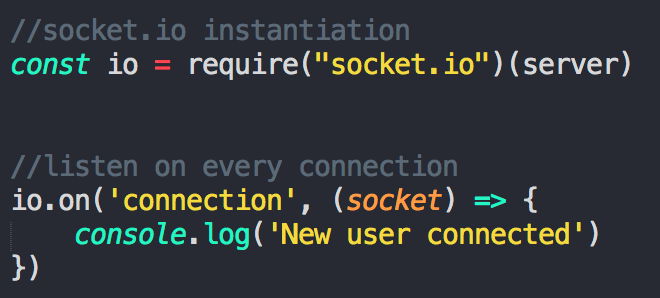
Here, the io object will give us access to the socket.io library. io object is now listening to each connection to our app. Each time a new user is connecting, it will print out “New user connected” in our console.
If you try to reload our browser on localhost, nothing happened… Why ? Because our client side is not yet ready.
For the moment socket.io is only installed on the server part. Next, we will do the same work on the client side.
Client side
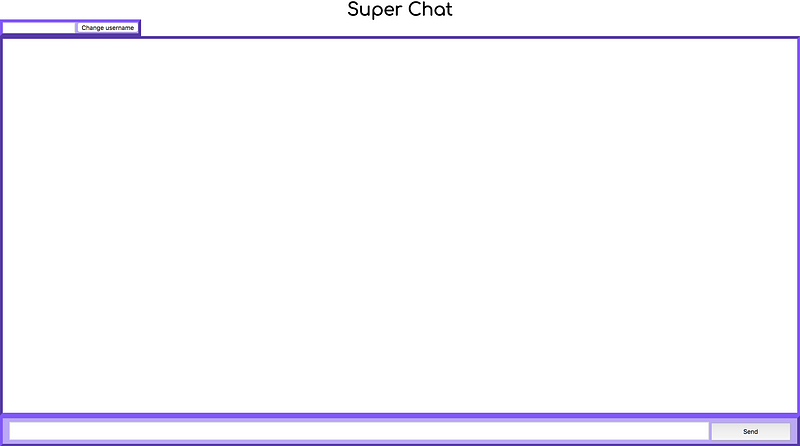
We just have to change a line in our app.js. In fact, we don’t want to display a « Hello world » message, but a really window with a chat box, inputs to write username/message and a send button. To do that we have to render an html file (which will be in our case an ejs file) when accessing the “/” root.
So you need to apply the render method to the res object.

In the other side, you will have to create a views folder, with an index.ejs file in it. The css will be in a public folder:
Our localhost:3000 will look like this :
So now that we have our basic template, we have to « install » socket.io on each client which will attempt to connect to our server. To do that, we have to import the socket.io library on the client side:
<script src=”https://cdnjs.cloudflare.com/ajax/libs/socket.io/2.0.4/socket.io.js"></script>
The only way to work with socket.io is in a .js file. So at the end of your body add these lines:
<script src=”http://code.jquery.com/jquery-latest.min.js"></script>
<script src=”chat.js”></script>
And create a chat.js file in the public folder.
For the moment, just write this in it :

As you probably guessed, when the client will load this file, it will automatically connect and so create a new socket.
So when you refresh the page, we will see « New user connected » in your terminal.
Send and receive data
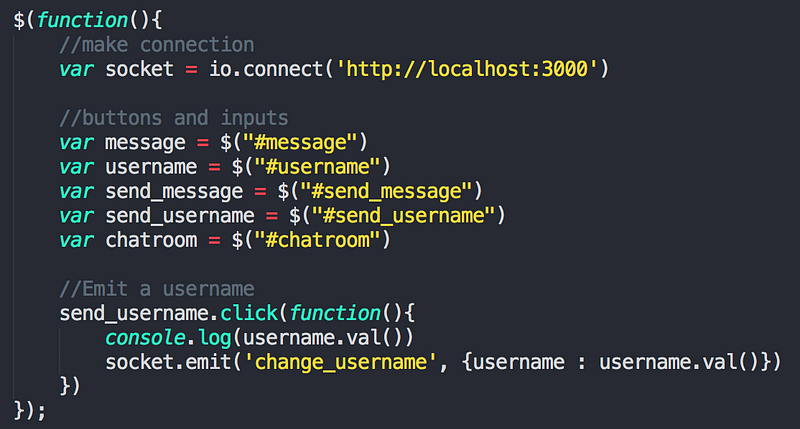
Username
When a user connects to our application, we will set him/her a default username, for example “anonymous”. To do that we have to go on the server side (app.js) and add a key to the socket. Actually, socket represent each client connected to our server.
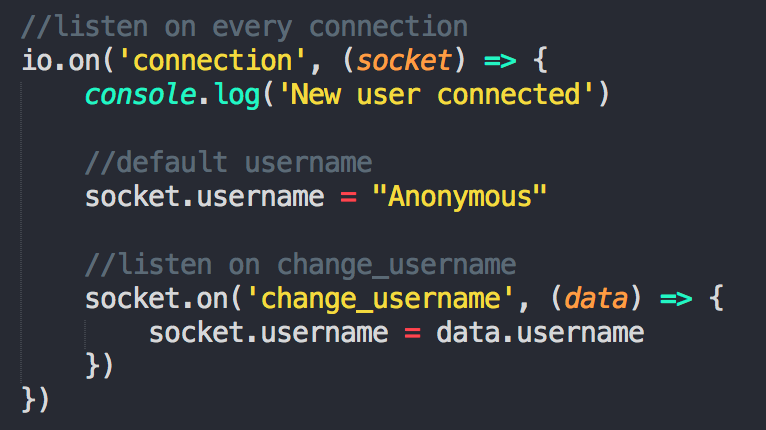
We also will listen to any call made in « change_username ». If a message is sent to this event, the username will be changed.
On the client side, the goal is to do the opposite. Each time the button change username is clicked, the client will send an event with the new value.
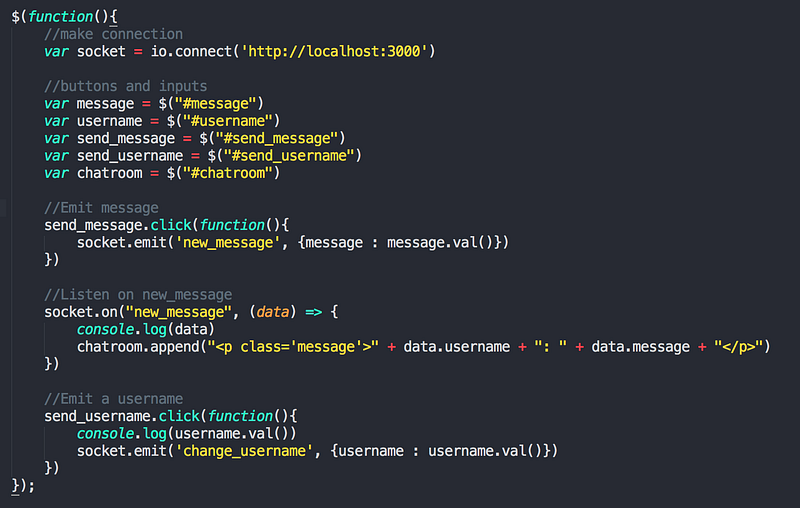
Message
For the messages, it is the same principle!
chat.js:
app.js:
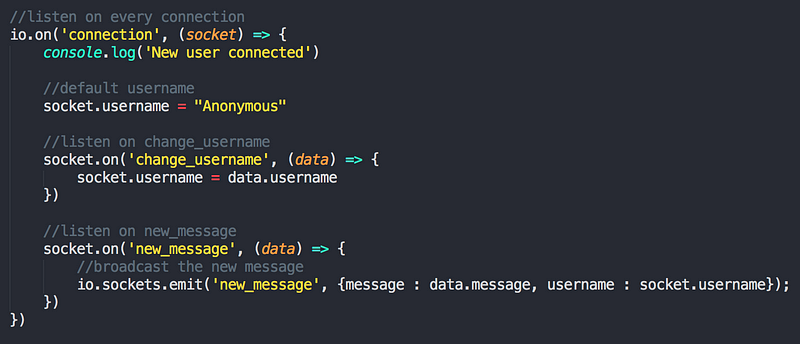
For the new_message event, you can see that we call the sockets property of io. It represents all the sockets connected. So this line will actually send a message to all the sockets. We want that to show a message sent by a user to all (and itself included).
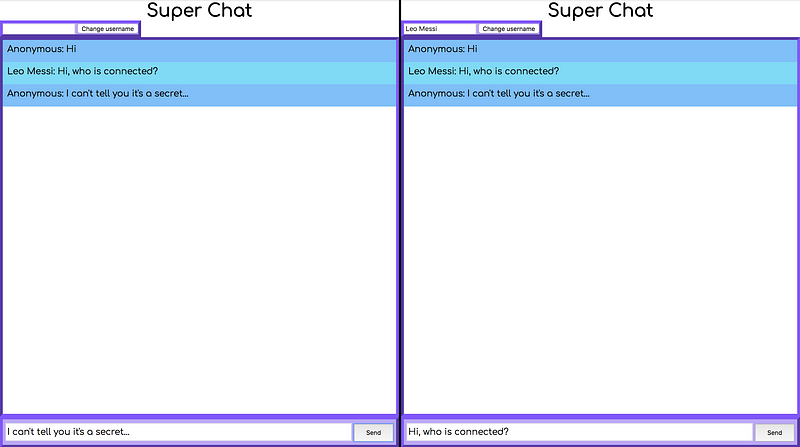
Here is the final result of our chat app:
Little improvement
We can add a quick improvement to make our application more realistic. We will add the « XXX is typing… » message.
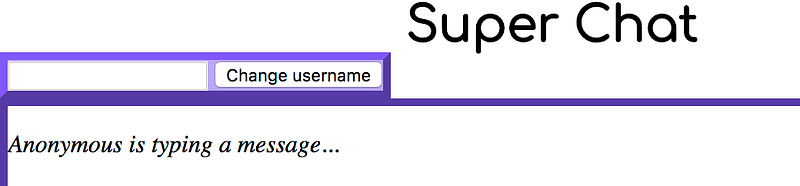
To do so, it is very easy.
After adding an HTML element in our index.ejs, we just add a jQuery event listener on typing and send a socket event named typing.
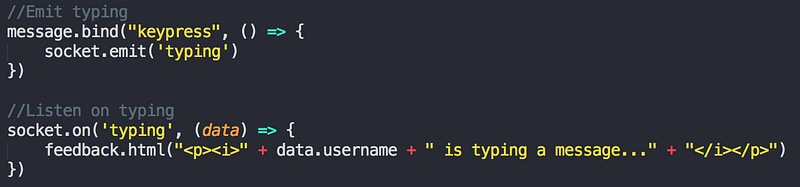
On the other side, we listen to typing and we broadcast a message. Broadcasting means sending a message to everyone else except for the socket that starts it.

Conclusion
See, this application is really easy to code. Before knowing the existence of WebSockets and socket.io, I thought this kind of application was really hard to code !
To improve this app, here is a list of functionalities to add:
- A registration system with the possibility to chat in a one-to-one chatroom
- History of all the conversations
- Online/offline labels
- Copy every features of WhatsApp !