Steps to convert content from a TXT or CSV file into Excel
02/03/2022
The steps to import a TXT or CSV file into Excel are similar for Excel 2007, 2010, 2013, and 2016:
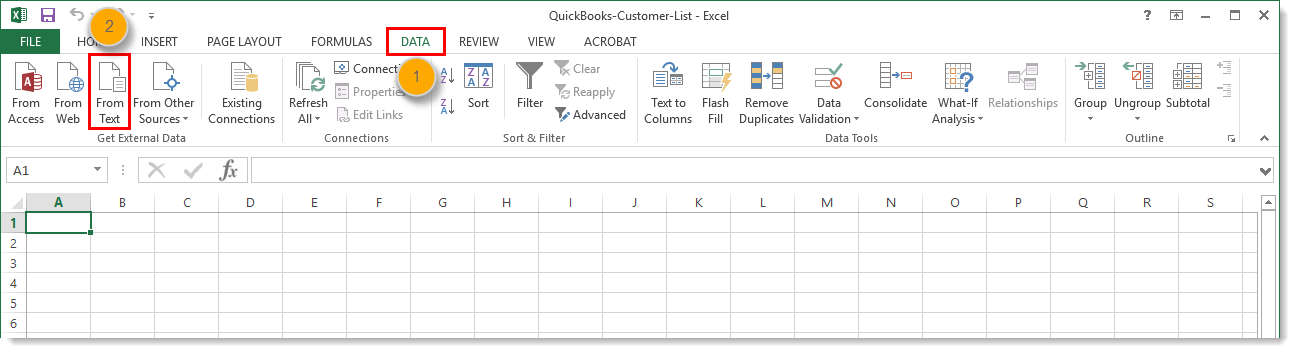
- Open the Excel spreadsheet where you want to save the data and click the Data tab.
- In the Get External Data group, click From Text.
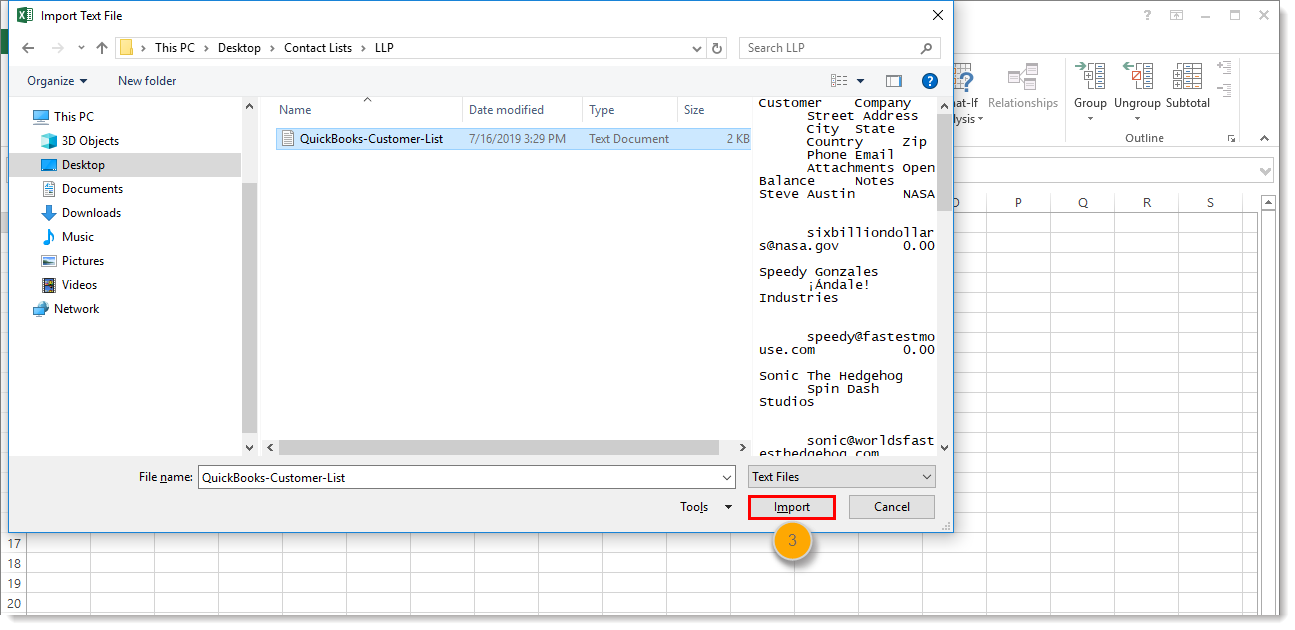
- Select the TXT or CSV file you want to convert and click Import.
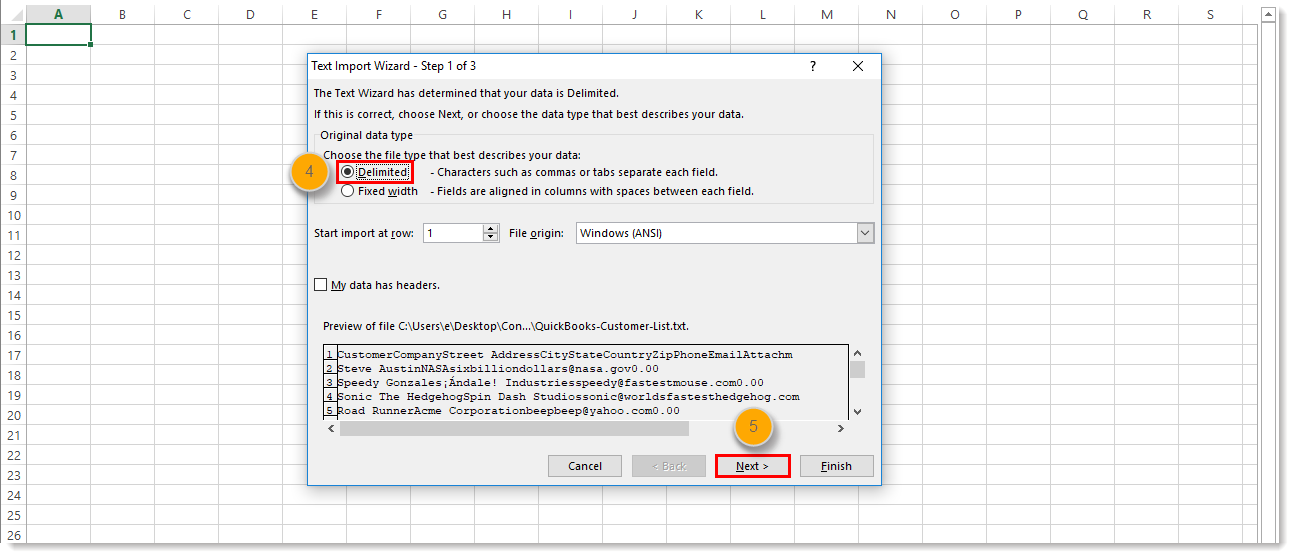
- Select “Delimited”. A delimiter is just a fancy way of saying that your TXT file uses tabs or your CSV file uses commas to separate and group your data.
- Click Next.
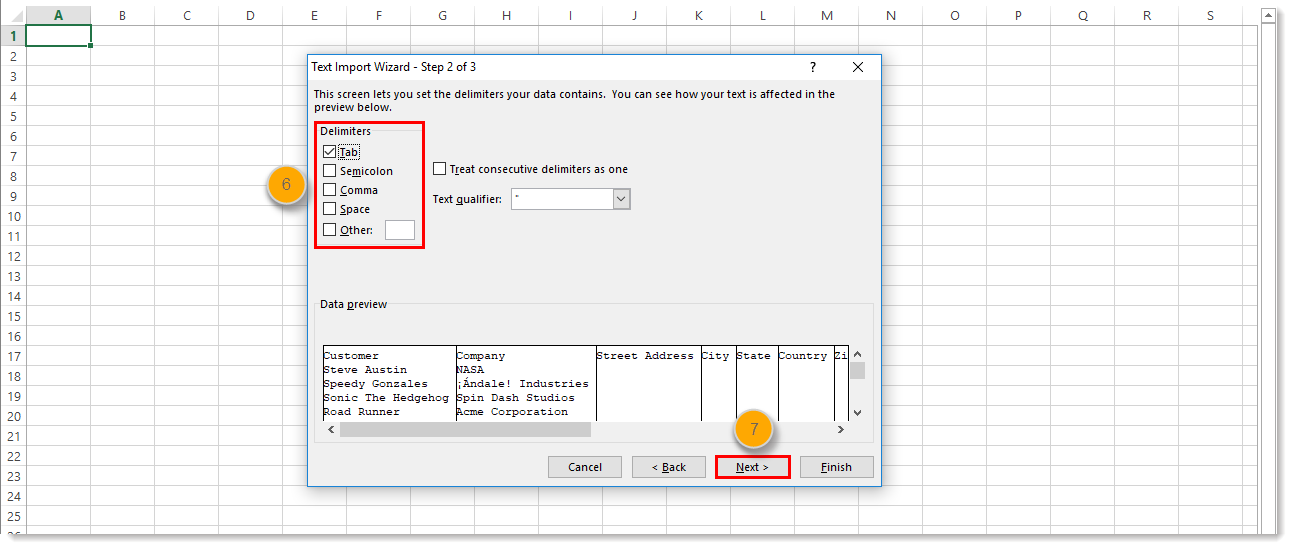
- Select the delimiter that groups your data into individual columns in the Data preview field. Typically you want to select “Tab” when converting a TXT file, and “Comma” when converting a CSV file.
Note: If you select “Space” it can sometimes split a single column into multiple columns if the column header text has multiple words. For example, a “First Name” column becomes a “First” column and a “Name” column. Look carefully at the Data preview to make sure your data is aligned with the intended column header! - Click Next.
- Select “General”.
- Click Finish.

- Choose “Existing Worksheet”.
- Add “=$A$1” to the field. This ensures your data begins in the Row 1, Column A cell of the spreadsheet. If there are any blank rows in the spreadsheet above your data, it can cause a file import error.
- Click OK.

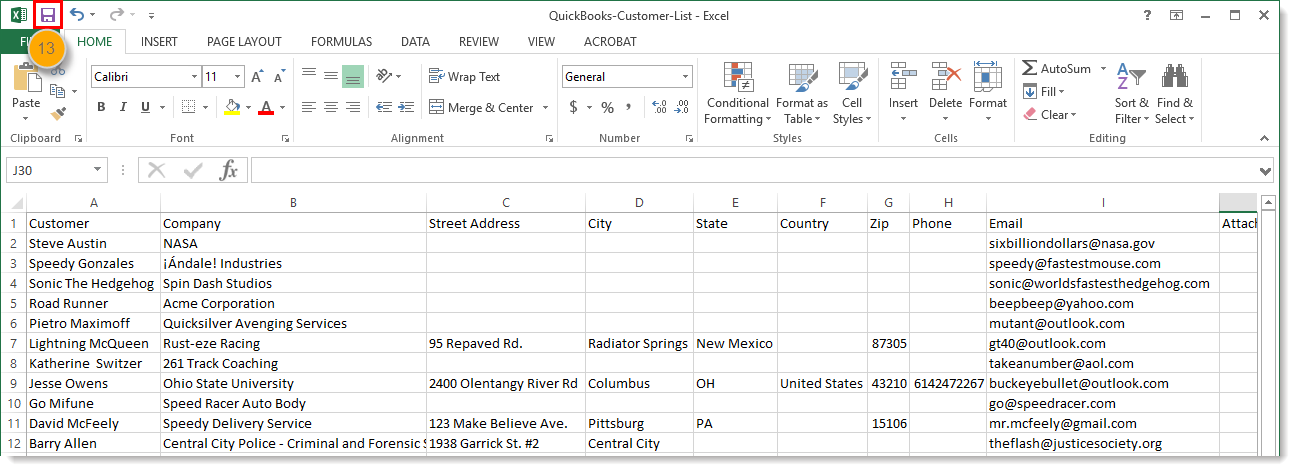
- Click Save.
You can now make edits to the column headers to make sure they match the standard contact headings in Constant Contact, correct spelling, or update the formatting and remove special characters to prevent import errors. When you’re ready, save your file and import your contacts.
Need more help saving a supported file as an Excel file? Please see Microsoft’s Support.
